In this series, I’m sharing battle reports from my games with Team England Paddington at the Warmachine WTC 2025. If you missed the first game, you can check that report out here.
| Team | Canada Terry Fox | England Paddington |
| Player | Seva (ComradeVS) | Jamie Perkins |
| Army | Cryx Necrofactorium | Khymaera Shadowflame Shard |
| Player Order | First | Second |
Scenario: WOLVES AT OUR HEELS
Literally the only other team with double Old Umbrey in the whole event, fantastic.
Canada Terry Fox are one of the teams a number of folks had, quite rightly, earmarked as contenders to win the WTC. Strength in depth, difficult array of armies to play against, led by an absolutely world class player in Marc-André “Bradigus” Leblanc. There aren’t any easy rounds at WTC, but there also aren’t many more difficult than facing Canada Terry Fox.
List selection
We had a suspicion I’d be drawn against their Necrofactorium player and that’s how things shook out.
Seva (ComradeVS) was rocking Dekathus and Sepsira. You don’t tend to see Dekathus dropped against Shadowflame Shard often because almost the entire Shadowflame Shard army is soulless.
Upon closer inspection, his Sepsira list had a lot of similarities with Travis’ from the Friday night game. Learning from that experience, I elected to drop my Shyryss list, which you can find here.
Seva’s list: Master Necrosurgeon Sepsira
27 Hellraker
7 HEAD – Heavy Venom Blaster
11 RIGHT ARM – Barbed Net Right
9 LEFT ARM – Void Plate Left5 Raptor
3 HEAD – Beaked Maw
2 BACK – Arc Node
3 Akulon Thaemestra
4 Iron Lich Commander
4 Maulgreth, The Charnel Plague
3 Skarlock Lieutenant
8 Mechanithrall Brutes
6 Mechanithrall Swarm 1
6 Mechanithrall Swarm 2
4 Necrosurgeon Initiates 1
4 Necrosurgeon Initiates 2
8 Sludge Thralls 1
8 Sludge Thralls 2
10 The FuriesCOMMAND CARDS
Blessing of the Gods
Lucky Penny
Old Faithful
Put the Fires Out
Sapper
TOTAL POINTS 100/100
Deployment
Before dropping Shyryss, I’d already clocked the existence of Maulgreth — relevant here because of his Entropic Force aura that stops the Trike’s Rapid Healing when he’s close by. I’ll need to be conscious of that.
The Hellraker is also a bit of a problem because its placement move effectively means it doesn’t care about needing to charge, and thus largely ignores Shyryss’ feat. It’s sporting a Barbed Net to boot, so I’ll need to be mindful of that when placing my Wyvern. Luckily this board, while more open than the last, has a number of obstructions on the centre line of the board I can use to block drag lanes.
The way I see it, with the “standard” buffs of Carnage, Scything Touch, and Power of Death on Sepsira’s feat-spawned unit of Mechanithralls, they certainly hurt a Trikhymaerax, but they’re not likely to kill it. If I’ve got Dragon’s Blood upkept they average “around” 15-20 damage. Of course that can scale higher when factoring in Entropic Force and the output of the Hellraker.
Seva racks Carnage, Ghost Walk, and Scything Touch. I rack Dragon’s Blood, Host of Shadows, and Silence of Death.
I win the starting roll and take a close look at the table, specifically where the flags will end up. I choose to go second because there’s a clear advantage to one table side where there’s a good flag position on a large obstruction closer to my deployment zone. I give Seva the other side where he can only place his flag on a far left flank obstruction close to the centre line of the board.
Seva deploys fairly centrally with Brute Thralls to my right, poised to sit on his moving 40mm objective. The Hellraker sits just to the right of his main battle line with Sepsira, the Furies, and Maulgreth in the centre flanked by Mechanithralls and Sludge Thralls.
I need to ensure the Wyvern keeps the Trikhymaerax and / or obstructions between it and the Hellraker. So the Trike sits largely opposite the Hellraker with the Wyvern slightly off to the left. There’s a unit of Talon Lashers down either side, the Vypex sticks near to Shryryss in the centre and the Shades advance deploy just to my left.
Turn one
Current Score: S0 – J0
Seva casts Scything Touch on the Hellraker and everything runs forwards. The Brute Thralls take up position around the 40mm objectives. A set of Sludge Thralls is slightly to the left of most of Seva’s army but by no means isolated. Sepsira, the Furies, and Maulgreth take up position in a central trench.
Shyryss casts Dragon’s Blood on the Trikhymaerax, Silence of Death on the left-hand Talon Lashers, then takes up position behind an obstruction.
The Trike runs up to just outside 13” of the Hellraker, its maximum melee threat. The Trike does not respect Sepsira’s feat threat range, because I don’t think it needs to. The Wyvern most certainly does, however.
The units position further ahead of my warbeasts on the flanks, occasionally checking to remain outside of important threat ranges, mostly the Sludge Thralls.
Turn two
Seva
Current Score: S0 – J0
This situation puts Seva in a difficult position. My Trike can charge 14”, which means I can reach the Hellraker if it remains where it is. Seva is likely thinking through the calculations of Sepsira’s feat taking on the Trike and reaching the same conclusion I did.
The Brutes move ahead of the 40mm objective, ready to score it and allow it to move up.
The far left Sludge Thralls make a break to run right behind the far left-hand objective terrain, caused by the board side I force upon Seva. They run right behind it looking to lock it down. I ponder this.
On the one hand, I’m not likely to score that now. On the other hand, it’s relatively easy to contest for me provided I do it in force (so if the Sludge Thralls appear, they won’t clear it, and I’ll be able to kill them in return). What’s most likely to happen is that objective is taken out of the game, but it comes at the cost of a Sludge Thrall unit for Seva, which is a trade I’m more than happy to make.
The Hellraker remains where it is. However Seva places 3 Sludge Thralls in a line directly ahead of it to block the placement of my Trike.
Sepsira puts up Tactical Precision but otherwise camps 7 focus and sits in her trench.
The Mechanithralls advance and spread out just ahead of her to project some threat while also being ready to run to contest objectives.
The Raptor runs through most of the Cryx force to contest the left 50mm objective.
Jamie
Current Score: S0 – J0
I feel my aggressive positioning on the Trike has paid off here. It’s difficult to “range joust” with the Hellraker due to the way it ignores my feat, but straight up ignoring his feat has levelled the playing field.
I upkeep my spells and look closely at the Wyvern. I can shoot at the Raptor and reposition back behind an obstruction to be safe from the Hellraker’s drag net. Seva has positioned far too well to let me catch and one of the Mechanithralls as well so I settle for shooting the Raptor, roll hot, and put massive damage onto it with a Draconic Aura boosted spray.
I take out my 120mm proxy and start checking exactly where the Hellraker can fit. Due to the 50mm objective ahead of my Trike, I can move up to score the right 50mm objective and there isn’t enough space for the Hellraker to fit on either side of it and be within melee range to attack me.
The Trike moves up and finishes off the Raptor with its shooting, killing two Mechanithralls along the way.
Shyryss feats this turn, primarily because the Wyvern is now within Sepsira’s feat range.
The Vypex and Paragon move over to the left to support the Lashers and Shades there. I need to ensure Seva knows the Sludge Thralls will all die if they pop their heads out to shoot at me.
The left-hand Lashers spread out onto my 40mm objective. The Shades reposition to ensure one of them contests the left-hand flag the Sludge Thralls are hiding behind.
The right-hand Lashers spread out in controlling positions of my objective terrain.
A decent score to kick off the scenario game. Seva moves his 40mm objective forward. Mine remains still; it benefits me more for now to force him to come to me.
Turn three
Seva
Current Score: S1 – J4
The start of Seva’s turns are noticeably slower than mine, but it makes sense as to why. My positioning is posing some quite difficult questions that need answering. Seva needs to ensure he’s contesting enough objectives without giving me too many models to destroy in the process.
He spends a few minutes checking possible Hellraker landing spots. He knows he can’t reach me for melee, but he wants to see if he can jump it off to my right, contest the right-hand 50mm, while remaining outside the Wyvern’s charge range. He reasons that if he can be outside melee of one of them, that might be enough. Unfortunately, there’s no way to contest the right-hand 50mm without being in the Wyvern’s charge range.
The left-hand Mechanithralls use Vengeance moves to send two forward and one moves backward. Some nearby Necrosurgeons add two more back into the unit to return them to full strength.
The Brute Thralls advance again to ensure they’re in position to score the 40mm objective for two more turns. The Sludge Thralls ahead of the Hellraker run forward to contest the right-hand 50mm objective and my objective terrain.
The Mechanithralls nearest to Sepsira run forward to contest both 50mm objectives and generally get in the way. The Skarlock Lieutenant runs up just behind to support them.
Sepsira puts Reposition 3” onto the Mechanithralls that just had two models returned to them. She then bolts off to the right-hand side behind the Hellraker. The Hellraker has not moved at all.
The repositioned Mechnithralls then advance around the obstruction my Wyvern is hiding behind to contest my 40mm objective, engaging my Wyvern and some of the Lashers along the way. All this enabled by that Vengeance move I triggered last turn.
I wondered if the Sludge Thralls would come forward too but Seva leaves them where they are. This is some gambit.
Seva is the only one to score a point this time. His 40mm objective moves forward for a second time.
Jamie
Current Score: S2 – J4
Well, we’ve both postured enough in front of each other; one of us is going to have to jump. It’s go time.
The Trikhymaerax can kill the Hellraker, but it needs enough buffs to do it. I pause to calculate. With Hunters Mark for a free charge plus Enrage from Bellighul, but losing one attack due to the Void Plates and attacking through the Furies’ Mortal Fear I average about 56 damage from the melee attacks.
That’s already being helped a little bit by Scything Touch being on the Hellraker, so I get an extra die out of my Many Eyed (Purgation) Head. I should push it over the edge with a few points from the guns but, I’d rather guarantee it.
The problem is my Vypex is a little far out to help as easily as I’d like. I have an order of activation issue before even looking at clearing a path for the Trike to land where I want it to.
The second issue I have is if I don’t kill enough of Seva’s army, he’ll just wipe me out in the counter attack. Sepsira still has her feat and there’s plenty of models on the board to attack with too.
Shyryss upkeeps Dragon’s Blood and Silence of Death.
The Paragon is in the way, so it charges the Mechanithralls around my 40mm objective. Now, this is a Paragon. All experienced Khymaera players know, without fail, that Paragons regularly miss attacks that they should hit most of the time.
There’s a reason memes like this exist:
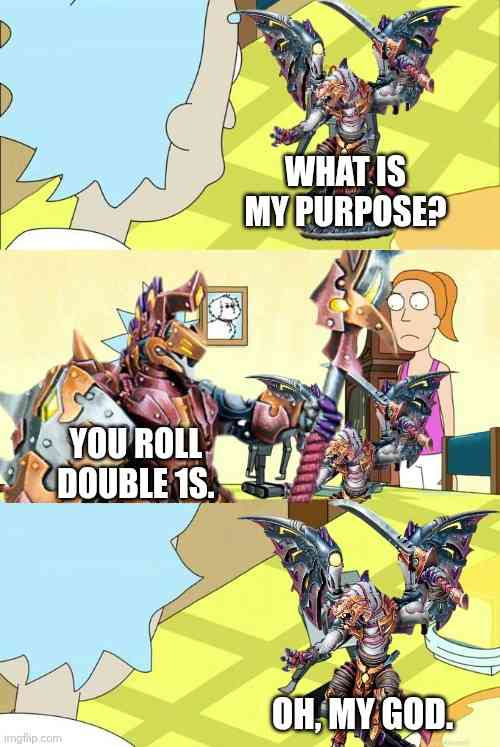
100% true story. In a recent practice game with Leo Robinson, I tasked my Paragon with charging at a knocked down Gravedigger Patriot on 10 ish health. I think to myself, “I can’t miss this, I’ll roll the dice in case I get lucky and hit the critical decapitation.” So of course I roll snake eyes and miss completely.
It’s for reasons like this, Khymaera players learn to position their Paragon’s assuming they’ll always miss, and so never rely on triggering Sprint. That I can promise you they DO have on their stat cards, but rarely ever sees the light of day. No I’m not bitter about it, why do you ask?
Anyway, yes, the Paragon misses the Mechanithrall. At least it’s out of the way.
My Vypex now charges near to the Trike, into the other Mechanithrall unit contesting the central 50mm objectives. It kills two of them. The charge “just” puts it within range to Hunter’s Mark the Hellraker, which it does.
Shyryss goes next, she takes the Lucky Penny and boosts a channeled Hand of Destruction, through the Vypex, onto the Hellraker. She then shoots a couple more of the Mechanithralls dead and positions to ensure she covers where both warbeasts will end up.
Now, with Hand of Destruction in addition to the other buffs, we have enough to bring down the Hellraker. Belighul Enrages the Trikhymaerax to complete the setup.
The Trike charges the Hellraker, rolls hot, and destroys it with a fury to spare.
The left-hand Lashers charge and kill the left-hand Mechanithralls before repositioning to sit back on the 40mm objective. The Shades adjust a little to throw one of them up beyond the obstruction to engage the Sludge Thralls, just in case they get any ideas now my warbeasts are pushing forward.
The Wyvern charges forward into the remaining Mechanithralls contesting the 50mm objectives. It finishes the Mechanithralls and kills the Skarlock Lieutenant. I take a shot at my real target, Maulgreth, with a Draconic Aura fully boosted spray. Inside the Mortar Fear aura and with a poor damage roll I deal minimal damage, but leaving Maulgreth on fire inside Draconic Aura.
I finish the activation off by repositioning further up to engage the Furies and other remaining models.
My right-hand Lashers remain. I’m fully committed at this point so I mainly need to ensure as much of Seva’s army is engaged as possible. They walk around the obstruction and engage the Sludge Thralls there. They attack and wound some of them but don’t kill any. This means they’re still contesting the right-hand 50mm and my objective terrain.
It’s around now I realise I never repositioned Shyryss backward at the end of her activation, so she’s further forward than I’d intended. The Trike is preventing Sepsira from getting feated Mechanithralls onto her but she’s still a little more exposed than I’d like. I move the Shadowmancers ahead of her to block landing zones near her and clear the Vypex of fury.
At this point Shyryss is on 2 fury, the Wyvern is on 4 fury, and the Trike is on 3 fury. If it all lives, something will frenzy next turn, but I reason it’s worth the risk to take as many Cryx models off the table as possible.
I don’t manage to contest Seva’s 40mm objective but, again, I think the attrition advantage is worth it.
Turn four
Seva
Current Score: S3 – J6
Seva was audibly frustrated when I killed the Hellraker. He didn’t think I should’ve been able to, and then I also rolled hot. I knew I was fairly odds-on to get it, but arguing that point now doesn’t help either of us.
This wasn’t helped by Maulgreth dying to a high fire roll (buffed by Draconic Aura).
Seva is going to get the bonus points from his 40mm this turn so the scenario game is about to swing more in his favour. But, to really capitalise on that he needs to pull attrition back his way this turn too.
A clever ploy…
The Furies walk through my Wyvern to contest the 50mm objective behind it. They cast Power of Death close enough to be negated, I let it go, since he has two more he can do anyway. Marionette goes onto the Trike, then a Dark Fire gets cast at it and does no damage.
This feels like bait.
Sepsira feats to place new Mechanithralls in a charging position. She casts Scything Touch on one of the new Mechanithralls, then puts up Carnage. Lastly she casts a Breath Stealer at the Trike.
This time I ask Seva to pause and flip the clock to me to think. He’s clearly baiting me for a key spell he wants. I can only negate one spell. I check the effects of Breath Stealer. The DEF doesn’t bother me, but the -2 SPD might be relevant next turn when I need to be on cleanup.
I force the Trike to negate it.
Seva then promptly moves onto his Iron Lich Commander and Hex Blasts the Dragon’s Blood off the Trike. So THAT’S what he was going for. I had looked at the Iron Lich, but managed to forget about it having Hex Blast. That’ll matter.
Sepsira runs around an obstruction to the right to safety.
The feat Mechanithralls charge at the Trike and drop it to around 25 health. There were some poor damage rolls in there too and I rolled a few 3s on Rapid Healing.
The Necrosurgeons behind where the Furies were now charge at the Wyvern. With Carnage, Scything Touch, and Power of Death they now hit at MAT 7 POW 15. They leave the Wyvern on around half health. I wondered if they might go into the Trike but with where the Mechanithralls ended up I don’t think there was space to fit them.
So, both big warbeasts are heavily wounded, but alive.
The Sludge Thralls engaged with my right-hand Lashers adjust their positions a bit and, between Carnage melee attacks and sprays, kill two Lashers and wound the third. The Brute Thralls charge in, killing the last one.
This allows the other unit of Necrosurgeons to run across and score his 40mm in addition to the Sludge and Brute Thralls scoring my objective terrain and contesting the right-hand 50mm. The Sludge Thralls on the far left kill the Shade they’re engaged with.
Seva gets the bonus score for moving his 40mm across the centre line.
Jamie
Current Score: S8 – J7
After such a big swing, I pause to check what the scenario game is likely to look like at the end of this turn. The bonus point score has really brought Seva back into it but I don’t think he has the longevity to sail that wave to a win.
My real issue is with fury. I have 4 fury each on my Trike and the Wyvern and I can only leach 4 total. I reason that I should clear the Trike due to the higher number of attacks and it being in a better position to clear models. The Wyvern frenzies, attacks a Necrosurgeon and misses. I clear the fury from it.
Between Shyryss and the Vypex, I take out the Sludge Thralls and one of the Brute Thralls.
The Shadowmancers give Guidance to the two remaining Shades as well as removing a fury from the Vypex.
The Shades then charge at the Furies and kill two of them thanks to magical Fortune Hunter attacks. The Trike kills the last one with its Many Eyed head, since its attacks are magical. The Trike then proceeds to remove the Mechanithralls engaging it, at least one of the Necrosurgeons, and I think one of the Brute Thralls.
The Paragon decides to wake up, charges the hiding Sludge Thralls to the left and manages to cut one in half with its charge attack before wounding a second. The Lashers run off the 40mm objective into the centre to support Shyryss and prepare to help with cleanup.
I score a few more control points and pass the turn back.
At this point, Seva has only a few seconds left, so nothing of note happens with his following turn and he’s my second opponent to lose to deathclock.
Conclusions
Thank heavens I had that game with Travis on Friday night. I don’t think Kyrrax would’ve handled this list at all, particularly with the Hellraker.
Seva was another excellent, friendly, and generally awesome opponent whom I’d relish the chance to cross dice with again.
Upon concluding my game, Chris comes to tell me he botched an assassination against Lissya Umbrey by taking inconsequential attacks on a turn he could likely kill her. He misses one and she dodges back to safety after Chris committed to the assassination, which leads to Chris being assassinated in return.
Jacob follows shortly after with a ground-out scenario win against Vargus Gravediggers. This puts us on 2 wins to 1.
Golly follows next by playing the full seven turns with Calder against Cyphon Dark Operations. He loses the game 19-18 on control points with his opponent going 1 point ahead on the final turn of the game. Looking at the table, there was basically nothing left on either side. We’re at 2-2.
Zilva finishes the round by completing what seems to be a very patient and methodical gameplan against Marc-André playing Azlanov Umbrey and pulls out the win. I’m not clear exactly what happened in that game to finish it, but Longshanks has the result recorded as a 10-7 scenario win for Zilva. Marc-André destroyed way more army points than Zilva did so he must’ve spent a lot of bodies to push for the win.
This secures a second round win for England Paddington over a really big team. Our blood is up now; we’re here to play.
Battle reports 3 and 4 will be up this week! In the meantime, there’s an overview in this episode of Warmanchester Radio:

Leave a comment